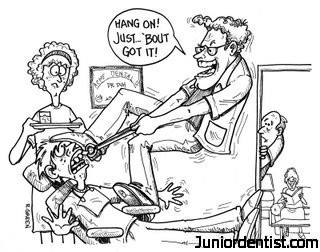
Extraction of a tooth without damaging the surrounding structures (Atraumatic tooth extraction) is the main aim of any Dentist or Dental student. To attain this goal I am going to explain in 5 simple steps how you can Extract a tooth like a professional as atraumatically as possible. Before we go into the steps let us look at some of the basics which we need to follow during any tooth Extraction.
Access and Visualization: This is the most important aspect of any type of Extraction, it is even more important while Extracting a Root piece (Maxillary) or Endodontically treated tooth, attaining proper Access and Visualizing the tooth is very important in preparing the treatment plan. To achieve Access, proper chair position is important along with isolation of the tooth by retracting any Tissue covering the tooth or root piece.
A clear pathway for removal of tooth: You need to make sure that during removal of the tooth a clear pathway is maintained. This means any structures surrounding the tooth which can hinder in the removal of the tooth are cleared for easy removal of the tooth.
Controlled Force should be exerted: While extracting any tooth, with firm or mobile or root stumps only a required amount og force is required to Luxate the tooth. The force should be exerted in a planned manner using the luxator or Forceps and not brute force which can lead to fracture of the tooth.

“Step 1” of Atraumatic tooth Extraction:
This involves stripping off the tooth of its soft tissue support, loosening of the gums which are attached to the cervical region of the tooth by using a Molt 9 Periosteal elevator. Run the Elevator tip parallel to the tooth at the junction of the tooth and Gingival slowly extering downward / upward force and buccal / palatal force all around the tooth. This helps in preventing any gingival support to the tooth which might lead to tearing off of the gingiva while extracting the tooth.
While completing this step we will be able to ascertain whether proper Anesthesia has been attained and also it helps in positioning the beaks of the Forceps below the cervical line more towards the Apex.
“Step 2” of Atraumatic tooth Extraction:
The second step is to Luxate the tooth from its socket, this involves breaking the Periodontal ligament support of the tooth using a Dental elevator.
The Elevator tip should be placed on the Mesial or Distal aspects of the tooth to be extracted. The tip of the elevator should always be applied on the Root portion of the tooth below the CEJ, this prevents fracture of the crown portion of the tooth. Once engaged constant on and Off force needs to be applied till you feel that the tooth is slightly mobile. The Elevator should not be used on the Buccal or Lingual aspects of the tooth as it can lead to fracture of the tooth or on loss of purchase point the instruments can slip and damage the Soft Tissue (Gums or Tongue).
“Step 3” of Atraumatic tooth Extraction:
This step is to select the ideal Forceps and placing the forceps on the tooth. Depending on the tooth to be extracted, the Forceps is selected. The Lingual beak is first placed on the tooth surface and then the buccal beak is placed, now slowly both the beaks are apically pushed without engaging the Gums in the process. On engaging the beaks as apically as possible, they act as wedges to dilate the crestal bone on the buccal and lingual aspects of the tooth.
The Forceps should be held at the end which multiplies the amount of force applied by the Dental Surgeon. The Center of Rotation and fulcrum is also maintained properly.
“Step 4” of Atraumatic tooth Extraction:
This step involves the luxation of the tooth using the Forceps, the beaks of the forceps are positioned as apically as possible and force is applied in the buccal and lingual directions in a slow and consistent manner without any excessive force or sudden jerks, which can lead to fracture of the root portion. The forces are applied for several seconds to make sure that the PDL is broken and the bone surrounding the tooth is expanded.
“Step 5” of Atraumatic tooth Extraction:
This is the final step which is the removal of the tooth from the socket after achieving required bone expansion. After proper luxation of the tooth, slight force in the buccal and lingual direction and rotational forces along with occlusal pull helps in dislodging the tooth from the socket. No excess force should be applied on the Lingual side in the Mandibular arch, as it will result in the fracture of the lingual plate. No excess distal force should be applied on the Maxillary third molar as it might result in fracture of the Maxillary Tuberosity.
Leave a Reply